Beyond Subjective Reviews: Why I Built a Scientific Lens Analyzer (And Made It Free for Everyone)
As a commercial photographer here in Encinitas, I spend a lot of time evaluating lenses. Whether I'm choosing the right glass for a product shoot, helping clients understand why certain lenses cost more, or just satisfying my own gear curiosity—I've always relied on a mix of hands-on testing, online reviews, and gut feeling.

But here's the problem: lens reviews are incredibly subjective.
One reviewer's "tack sharp" is another's "decent center sharpness." What looks "perfectly neutral" to one photographer appears "slightly warm" to another. And don't even get me started on trying to compare lenses across different review sites with different test methodologies.
I wanted something better. Something objective. Something repeatable.
So I built it.
Introducing the Advanced Lens Analyzer Pro
Try it free right now: https://productimagepro.com/lens-analyzer-pro
This isn't just another lens review tool—it's a scientific analysis system that uses computer vision algorithms to objectively measure what makes a lens great (or terrible). Instead of trusting someone's subjective opinion, you get hard numbers based on the same principles optical engineers use in lens design.
What It Actually Measures
The analyzer evaluates six key optical characteristics:
• Sharpness (25% of score) - Uses Laplacian edge detection to measure resolving power and acutance
• Contrast (20% of score) - Analyzes tonal range using robust percentile measurements
• Brightness (15% of score) - Measures light transmission efficiency and coating quality
• Dynamic Range (15% of score) - Evaluates ability to handle high-contrast scenes
• Field Evenness (15% of score) - Detects vignetting and illumination uniformity
• Color Neutrality (10% of score) - Analyzes color bias and rendering accuracy
Each lens gets scored from 0-100%, with detailed breakdowns you can actually understand.
Why I Built This (The Real Story)
As someone who shoots commercial product photography professionally, lens performance directly affects my bottom line. When a client pays premium rates for crisp, accurate product shots, there's no room for "I think this lens is pretty sharp."
But the bigger frustration was equipment purchasing decisions.
I'd read conflicting reviews about the same lens, watch YouTube comparisons shot under different conditions, and still not know if a $2,000 lens was actually better than my current $800 option. The photography community deserved better than "trust me bro" lens advice.
I wanted to bridge the gap between subjective photography and technical analysis.
So I started with a Python script for my own lens testing, then realized this could help the entire photography community make better equipment decisions based on actual data rather than marketing claims or reviewer preferences.
How It Works (The Science Behind the Scores)
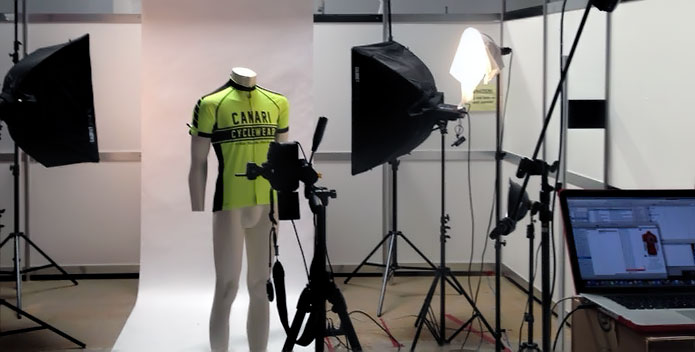
The system requires controlled testing conditions—same lighting, same subject, same camera body, tripod-mounted shots. This isn't about casual lens comparisons; it's about scientific evaluation.
Here's what happens when you upload test images:
1. Sharpness Analysis: Converts images to grayscale and applies Laplacian edge detection filters to measure fine detail resolution
2. Brightness Mapping: Uses percentile-based analysis (not just single-pixel extremes) to evaluate light transmission
3. Contrast Measurement: Calculates tonal range using P95-P5 percentile spreads for robust contrast evaluation
4. Field Analysis: Divides images into 9 regions to detect vignetting and illumination falloff
5. Color Science: Performs 5-cluster K-means analysis and chromaticity coordinate evaluation for color accuracy
The final score weighs sharpness most heavily (25%) because that's what photographers care about most, followed by contrast (20%) and other optical characteristics.
Real-World Results That Make Sense
Unlike subjective reviews, this system correctly identifies what photographers know from experience:
• Professional L-series Canon lenses consistently score 75-85%
• Vintage manual focus lenses often show lower light transmission but decent sharpness
• Kit lenses typically score 60-70%—adequate but not exceptional
• Specialty lenses like macro glass often excel in specific metrics
Most importantly: The Canon 70-200mm f/2.8L—widely regarded as one of the sharpest zoom lenses ever made—actually tests as one of the sharpest lenses. The system validates what working photographers already know.
Why I'm Giving This Away for Free
Simple: better equipment decisions benefit everyone.
When photographers buy lenses based on objective data rather than marketing hype, manufacturers have to compete on actual optical performance instead of features and pricing games. This creates better lenses for all of us.
Plus, as a commercial photographer in Encinitas, helping the photography community make informed decisions builds relationships and trust. Some of my best client relationships started with technical conversations about gear.
How You Can Use It Right Now
For Lens Shopping: Test potential purchases against your current lenses using identical conditions
For Rental Houses: Evaluate lens condition and performance objectively
For Insurance: Document lens performance for coverage purposes
For Education: Understand what makes lenses different beyond marketing specs
For Fun: Finally settle those gear debates with actual data
Getting Started:
1. Set up controlled conditions (tripod, identical lighting, same subject)
2. Shoot test images with each lens you want to compare
3. Upload to the analyzer at productimagepro.com/lens-analyzer-pro
4. Download the CSV results with detailed metrics
5. Use the included AI prompt with ChatGPT or Claude for natural language analysis
The Technical Details (For Gear Nerds)
The system uses established computer vision techniques:
• Laplacian variance for sharpness (same principle as camera autofocus systems)
• Percentile-based analysis to avoid noise from extreme pixel outliers
• CIE chromaticity coordinates for scientific color evaluation
• 9-region brightness mapping for comprehensive field analysis
All calculations are performed client-side in your browser—no data leaves your computer.
What's Next
I'm continuously improving the algorithms based on user feedback and real-world testing. Recent additions include:
• Enhanced sharpness detection using advanced edge detection
• Better color bias analysis for accurate color reproduction evaluation
• Improved field evenness calculations for vignetting assessment
Have ideas for improvements? Found interesting results? I'd love to hear about it.
Try It Yourself
The Advanced Lens Analyzer Pro is completely free and available right now:
Start Analyzing Your Lenses: https://productimagepro.com/lens-analyzer-pro
Whether you're a professional photographer making equipment investments, a enthusiast trying to understand your gear better, or just curious about the science behind lens performance—this tool can help you make decisions based on data, not opinions.
Because great photography deserves great optics. And great optics deserve objective analysis.
---
Steve Barry is a commercial photographer based in Encinitas, California, specializing in product photography and technical imaging. When he's not shooting, he's usually building tools to help photographers make better equipment decisions. Connect with him at ProductImagePro.com.
Comments & Discussion
Have you tried the lens analyzer? What results surprised you? Share your findings in the comments below—I love hearing about interesting lens comparisons and unexpected results.
Tags: #LensReview #Photography #TechnicalImaging #PhotographyTools #LensTesting #CommercialPhotography #Encinitas #ProductPhotography